

Let’s start with what this post is not supposed to be. It is not a ‘how to get your first bow drill ember’ kind of thing. It can, however, help you achieve that as well, as the tips and tricks I talk about here will make your job easier in general.
So let’s start with the spindle. From a technical point of view, it’d be best not to make it out of a small branch or a twig and rather split a larger piece of wood and carve it down to avoid having the pith running through the middle of your spindle.

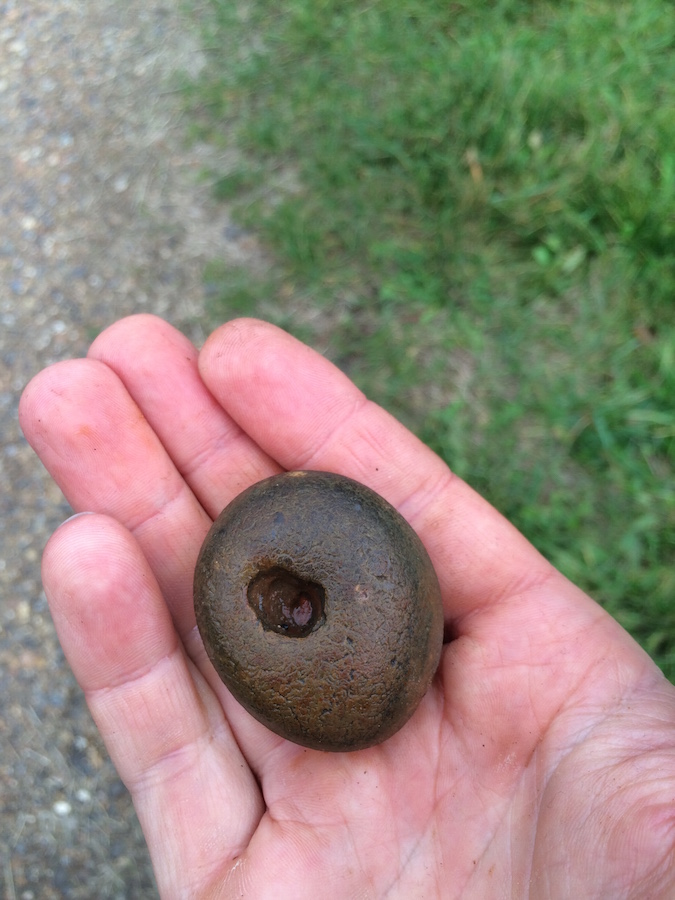
Clearly visible pith in the middle of an ash branch
Many species of trees tend to have a lot of pith which is softer than the rest of the stick, and will make the top of your spindle fray up very quickly as you’re drilling making the job almost impossible. You could, of course, take your time and look for a better piece of wood with less or no pith. But sometimes you can’t afford such luxury and have to work with what’s available. The problem is, splitting and carving isn’t the most energy efficient way of preparing a thin, straight stick and, unless it’s raining, it’s rather unnecessary. Especially that all it takes to make a spindle is finding a straight dead twig and shaping the ends, which unlike the first method, takes just a few minutes.
In this case, if it’s dry and we actually need to make a fire with a bow drill, it would be smart to take the easiest rout and use the first suitable stick you find. What about the fraying tip? Many people have a very good habit of carrying vaseline or other creams and oily stuff. If you don’t, I highly recommend doing it too. You can use that stuff to lubricate the tip of your spindle. Just apply a pinch to the part that will be in contact with the bearing block and it should hold up long enough without breaking up and slowing you down.
 You’ll notice that I mentioned a bearing block. That’s another thing that can either make the drilling smooth and simple or impossible. From my experience, unless you have no choice, you should never use wood for your bearing block. And if you really have to, at least use green wood. It won’t heat up as quickly and won’t create as much friction as dead wood, at least in the beginning. But the truth is, with rare exceptions, wood is a poor socket material. It gets worn out quickly making the drilling an excruciatingly hard job. More over, when used as a bearing block, it tends to heat up fast and may burn your hand before you even see smoke from the proper side of your spindle.

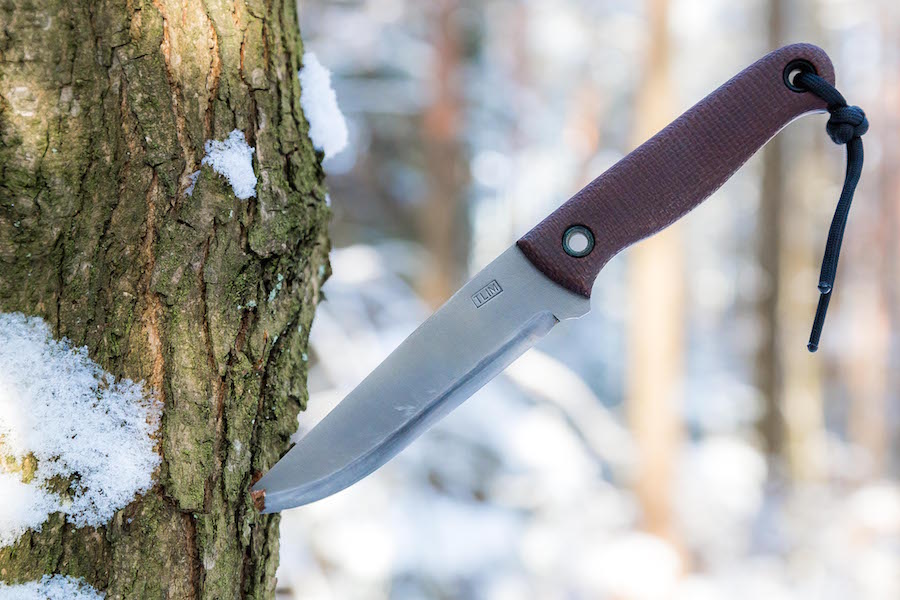
Mora High Q Robust with a coin embedded in its sheath to serve as a bow drill bearing block
Therefore, I would recommend that whenever you can, you should use something else. Look for smooth stones with natural holes in them, such as the flint stone in the picture above. If you’re near a coast, search for some larger shells. They will do a good job too. You may even use your knife or sheath if they’ve been adapted for such a task.
A knife with robust eyelets which can be used as bow drill bearing blocks
A bow drill socket can also be made from bone, antler or horn. These can sometimes be found in the forest as well as, unfortunately ubiquitous, rubbish. Pieces of glass, metal cans and even solid pieces of plastic such as bottle caps will do a better job than dead wood.
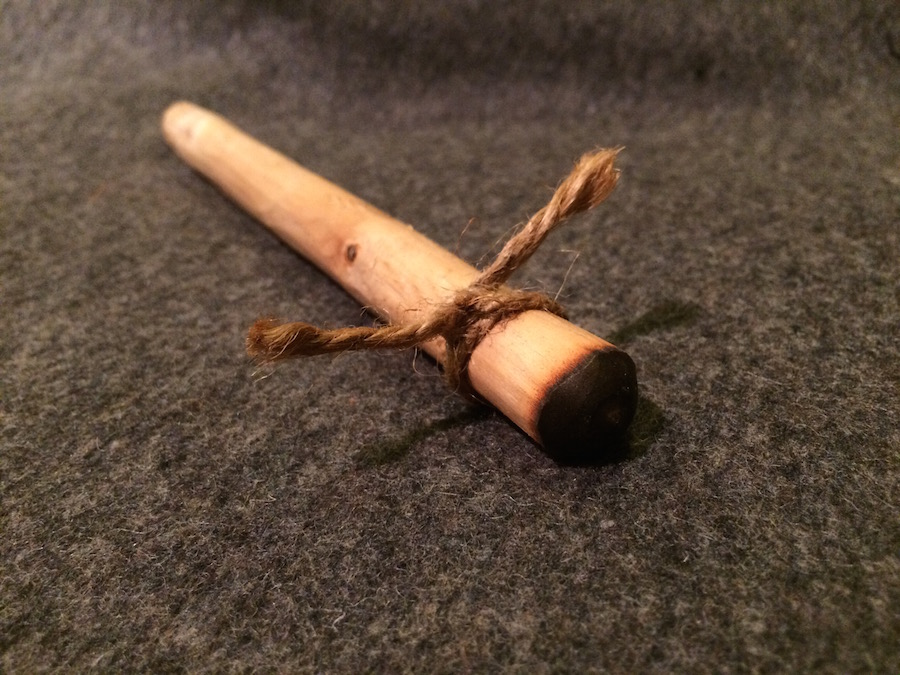
Spindle with a ‘fan’
The third and final trick is, as far as I know, a complete novelty. I call it ‘propeller‘ or ‘fan‘ and that’s exactly what it does – it fans your dust pile while drilling. What are the advantages of this solution? This little piece of cordage tied to the lower portion of the spindle really shines in still air conditions or when practicing indoors. It prevents the smoke from rising straight in your face making breathing a lot easier. It’ll also allow you to see what’s going on with your hearth board and the pile. It pretty much makes it possible to tell if you can stop drilling already.
Another important thing is oxygenating the pile. Sometimes when there’s absolutely no wind, you will be producing a lot of smoke but no ember. This usually means your pile is not receiving enough oxygen. This little fan will provide that while at the same time it is gentle enough no to blow your dust away. It’s also pretty cool to watch it work 🙂


